How To Fix USB Ports Not Working On Windows Error
Why Are My USB Ports Not Working?
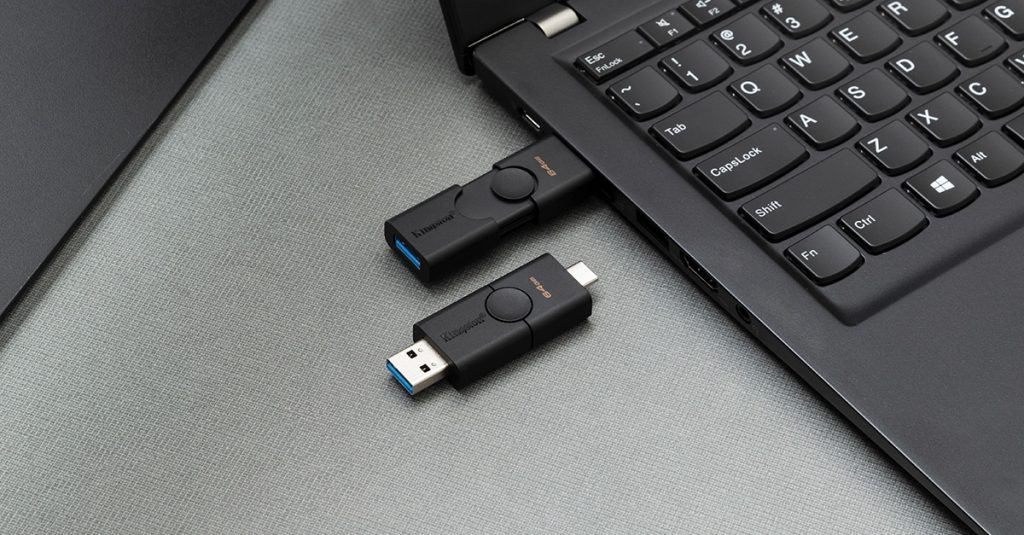
Why Is One Of My USB Ports Not Working?
In the case of hardware issues, It indicates it is because the USB port has been damaged. Sometimes, a deformed Pen drive could also be the cause of this error. In the case of software issues, it could be meaning that USB is not secure to be inserted into the Laptop and, sometimes, the absence of files or drivers can cause USB ports not working.
How to Fix USB Ports Not Working on Windows 10, 8 and 7
Fixing USB ports not working on a Windows system involves several steps, from simple troubleshooting to more advanced methods. Here are detailed steps to diagnose and fix the issue:
Basic Troubleshooting
Restart Your Computer:
Sometimes, a simple restart can resolve the issue by resetting the hardware connections.
Check USB Ports Physically:
Inspect the USB ports for any physical damage.
Ensure the USB device itself is not faulty by testing it on another computer.
Try Different USB Ports:
Plug the USB device into a different port to see if the problem is isolated to a specific port.
Software Troubleshooting
Check Device Manager:
Press Windows + X and select Device Manager.
Expand the Universal Serial Bus controllers section.
Look for any devices with a yellow exclamation mark or red cross. Right-click on them and select Update driver.
Disable and Re-enable USB Controller:
In Device Manager, right-click on each entry under Universal Serial Bus controllers and select Uninstall device.
Restart your computer. Windows should automatically reinstall the USB controllers.
Update or Rollback Drivers:
In Device Manager, right-click on your USB controller and select Update driver.
Alternatively, if the problem started after a recent update, select Properties > Driver tab > Roll Back Driver.
Check for Windows Updates:
Go to Settings > Update & Security > Windows Update and check for updates. Install any available updates as they may contain fixes for USB issues.
Advanced Troubleshooting
Disable USB Selective Suspend Setting:
Go to Control Panel > Power Options.
Select Change plan settings for your current plan.
Click on Change advanced power settings.
Expand USB settings > USB selective suspend setting and set it to Disabled.
Click Apply and OK.
Check Power Management Settings:
In Device Manager, right-click each USB Root Hub and select Properties.
Go to the Power Management tab and uncheck Allow the computer to turn off this device to save power.
Run Hardware and Devices Troubleshooter:
Open Settings > Update & Security > Troubleshoot.
Click on Additional troubleshooters.
Select Hardware and Devices and run the troubleshooter.
BIOS/UEFI Settings:
Restart your computer and enter the BIOS/UEFI settings (usually by pressing Del, F2, or another key during startup).
Ensure USB ports are enabled.
Save and exit BIOS/UEFI.
Reset BIOS/UEFI to Defaults:
If you recently changed BIOS settings, resetting them to default may resolve the issue. Refer to your motherboard manual for specific instructions.
Check for Malware:
Run a full system scan using your antivirus software to rule out any malware interference.
Hardware Troubleshooting
Test USB Devices:
Test the USB device on another computer to ensure it’s not faulty.
Test a different USB device on your computer to verify the port functionality.
Use a USB Hub:
If a particular port is not working, try using a powered USB hub to see if it works with your device.
If none of these solutions work, it might indicate a hardware issue with your motherboard or the specific USB ports. In such cases, contacting a professional technician or the manufacturer for support is advisable.
Solution 1: Restart Your Laptop
It’s one of the easiest and most effective strategies of all the methods. This article will provide you with a few steps to reboot your Laptop.
Step 1. Click the button for windows on the keyboard.
Step 2. The menu will appear with lots of choices.
Step 3. Click on the option to restart.
Plug in the USB and check if you can determine if the USB Ports is not operating issue is resolved or not. If not, then try the other steps listed in the list.
Solution 2: Adjust Power Management
Sometimes windows will close your USB controller to ensure that it conserved more energy. You can alter the power management and then turn off your USB controller to accomplish this and I’m going to walk you through how to do it.
First step: Step 1: Press Windows+ R completely on your keyboard. Run appears on the left-hand corner of the display.
Step 2. In the dialog box, you can type “devmgmt.msc” and hit Enter (don’t make use of an the column that is inverted).
Step 3. Device manager is displayed on the screen. Under device manager , double-click universal Serial Bus controllers.
step 4: Select the final option, i.e. USB ROOT Hub and select the properties.
5. Select the tab for power management, which is located in the column that is last.
6. In the tab for power management,, choose the first selection i.e. “Allow the computer to turn off this device to save power”.
7. When you’ve selected the first option below, click”ok” “ok” button.
After you’ve completed all the steps above, make sure you connect the Pen drive once more to verify the results.
Solution 3: Set up USB drivers
We all know that this is a problem with the USB therefore USB USB driver plays an important function within your Laptop. In this article, I’ll give you a way to repair the malfunctioning USB port. Reinstall your USB driver. Sometimes, some files are not recognized or corrupted by the USB driver, and as a result the USB driver did not work.
Follow the steps below to fix the broken USB port on your laptop:
First step: Click Windows + R completely on your keyboard. Run appears on the left corner of the screen.
Step 2. In the dialog box enter “devmgmt.msc” and hit Enter (don’t utilize an the column that is inverted).
Step 3. Device manager is displayed on the screen, under the device manager, double click universal Serial Bus controllers.
step 4: Select the final option, i.e. USB ROOT Hub then choose the properties.
5. In the property menu, click the device that you want to uninstall.
Step 6. Repeat the same procedure to the next USB Root in the section of the Universal Serial Bus Controller.
Step 7 Once you have completed all steps successfully, make sure you restart your computer for a successful result.
Solution 4: Upgrade USB Driver
We all know that this is the issue with the USB therefore it is no surprise that the USB driver plays a crucial part on your Laptop. In this article, I will provide a solution to fix the broken USB port, by updating to the USB driver. Sometimes, files get lost or are damaged in the USB driver, and as a result the USB driver was not working.
Follow the steps given to upgrade to the USB driver. There are two methods to upgrade the driver for your Video card.
- Automatically
- Manually
If you’re not aware of the organization behind USB driver, you can you can update it automatically. To do this, you need to follow these steps:
First Step: Hit the “Windows” button and “R” on the keyboard together
Step 2. Then , a dialog box will be displayed.
Step 3. In the dialogue box, write “devmgmt” in the dialog box.
Step 4. Then, go to”Driver”. “Driver” tab.
Phase 5: Then click “Update Driver” and select the option to update automatically.
Following the steps above you are able to upgrade the video card driver automatically. If you’re aware of the driver for your video card, then you can take your time and update it manually. It is more secure than doing it automatically.
1. Choose the Internet browser i.e. Google chrome, safari, UC browser
Step 2. Click on the USB device company’s logo.
Step 3. After that, click on the most recent driver for your video card, and test it against your computer Also, check the window’s size bytes.
step 4: You can then download it or modify it in real time.
Follow these two steps to make sure you are up-to-date with your USB driver.
Method 5: Disable USB Selective Suspend
Deleting Suspending the USB specific Suspend is another option to correct the USB port issue in your Laptop for this. Here are a few simple steps :
First step: Step 1: Press “Windows + X” completely on your keyboard. A Windows mobility center will appear on your screen.
Step 2. In the window the center for mobility selects the power option. (Charger as well as battery icons)
Step 3. After that, click on power plan settings, then choose to modify the power plan.
4. A menu will appear, and then sub-click on the change Advanced Power Settings
Phase 5: Step 5: Go to USB settings, then right-click on the USB setting.
Step 6 The USB select setting is as a disabled option that is selected
7. Click the Apply option after having completed all steps, and then click the OK button to display the screen.
I’m hoping this method will work.
Method 6: Remove Laptop Battery
In some instances there are instances when the battery on the Laptop isn’t properly fixed which could cause things like problems with USB port not functioning. If you are looking to repair the USB port, one option is to simply remove the laptop battery and then insert the new one with care.
Conclusion
All of these are working, successful and viable ways to solve the USB port. I’m hoping you can fix the USB Ports that aren’t working using one of these ways.