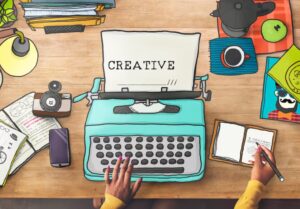
Beginners Guide: 5 Simple Steps To Make Remarkable Blog Visuals

You’ve probably already decided to start your own blog. Bravo!
You’ve thought of everything – you found your niche and have an original idea that can set you apart from everyone else. You know how to write articles people will talk about and the only “item” missing is the visual part of your blog.
A lot of successful blogs have graphic designers in their team, but if you are just starting out, that might not be an option.
So, what could be the solution for making blog visuals?
Most people turn to stock photos, which could be a great solution in some situations, but sometimes you will need something more specific, more personal, more detailed, or you simply want to create a blog that is entirely yours.
Luckily, there are other solutions as well. You can use one of many free online platforms to create your own visuals, no matter how much knowledge or practice you have in design.
These platforms make designing visuals as easy as it can get and in this article, you’ll learn the most valuable design tips and how to make unique blog visuals in a few steps. Blog visuals can help you increase your business objectives.
What makes visual content effective in blog posts?
Besides being great for Search Engine Optimization, visual elements of your blog are important because they can allure and inspire your readers, increase the readability of an article, and make written information more explicit.
We know that the most important thing in your blog is the text that will bring value to your readers. But remember, every time you share your blog, the headline, and the main visual element are shown. And most people first react to the visual information.
So, you’ll need to capture their attention and engage the readers by offering them an overall visual design that will make your blog stand out among the others in your niche.
Of course, when readers see huge chunks of texts with no visual elements in them, they tend to simply give up on reading and leave the blog. If you do include visuals to your blog, not only that you’ll make the blog more readable, but you will also give your readers time and space to rest their eyes from letters and enjoy some other form of information, and ultimately, they’ll understand you better.
We mentioned that visuals are good for SEO. That’s true, but you need to pay attention to how your images and videos are optimized. If you do it well, Google will see your blog as relevant and how you tackle your topic as well-adapted to readers.
Visit Dinar Recaps for more details
5 aspects of great visual content
Stay on point
Even though visual content is very important for your blog, you shouldn’t upload images only to have them there. Every visual element should have its purpose and should be relevant to the story you are telling.
When you use visuals with purpose, they will drive traffic to your blog and engage the readers. But, if you are just putting random visuals, they can do more damage than you can imagine – the readers could stop trusting your blog and your rankings will be bad.
Visuals must follow your brand guidelines
Your brand strategy should be felt and heard throughout all of your online elements – web design, content, visual elements, etc.
Visual elements are there to support your brand, not only in the colors or shapes you want to use but also in the attitude you present. The same thing can be presented in many ways, so make sure that the visuals in your blog show the same values and emotions as your brand does.
Find the perfect balance
Your text and the visual elements should be perfectly balanced so they support each other.
Luckily, finding perfection, in this case, isn’t that hard.
You shouldn’t put too many visuals in your blog posts because they could swamp the entire blog and make it unreadable. You can just make flyers for free and use it in your blog post to bring more value to your readers.
As a general rule, one visual per chapter is just enough. Of course, depending on your topic, you will sometimes need a few visuals to illustrate what you are writing about. In that case, break down the visuals by headings and include at least a paragraph to explain why you are using that visual and why they are important for the topic.
Optimize the visuals
Every visual on your blog has an HTML code in it, which contains information that will help websites (and readers) understand your images. For example, whenever someone uses a visual search, if your visuals are well-optimized, that someone is more likely to see your image and click on your blog.
The most important things in HTML code are title and alt tags, so make sure to at least optimize those parts. They describe your visual content to software when it can’t read the visual data. Also, title and alt tags help readers with visual impairment understand what you wanted to achieve with those visuals.
Simple is more effective
When adding graphics, you should aim for simplicity, because you want to be informative and illustrative and avoid noise in communication. To engage your readers, create infographics that are simple and minimalistic.
You can do that by using online software, like Visme, PhotoADKing which easily guide you to creating attention-grabbing designs.
How To Make Remarkable Blog Visuals in 5 Simple Steps
Decide on the format for every type of information
Think about what you want to say and what is the best/easiest way to show it to the readers so they can understand it better.
For example, when you have some statistical data, use statistical formats, such as charts, graphs, and pies to illustrate the text better.
Infographics are great when you have a lot of data that you want to include in a single visual. Using free icons is great when you are breaking down a process.
Take a moment to think about your content and the best way to present it.
Use templates whenever you can
Whatever you want to show, someone probably showed something similar already. And some designers thought about helping you do that, too!
So, once you decide what you want to show and how to show it, find the most suitable visual template so you don’t spend too much time creating your visuals. Templates can help you a lot, especially if you are a graphic design amateur – you won’t have to research the rules and tips for creating awesome visuals. All you need to do is insert your data and see how the visual came out just right.
Customize the templates to your needs
Even if you don’t find a template that will answer all of your needs, you can easily customize it.
Change the title and the rest of the text, decide on the quotes you want to highlight, make the statistics and data pop out, rearrange the icons, add images… You can rearrange all these elements to support what you want to say and show better.
Integrate your brand
When creating graphics, you should use your brand’s colors and use your logo in a graphic corner. Pay attention to fonts as well, since you can change them too. Use the type of icons and shapes that match your brand guidelines and follow your brand standards.
Publish the graphic in the form you want to
You probably already use a few image formats on your blog, so export the graphics in those formats while making sure that the quality is suitable.
If you are using some visual formats for the first time and don’t know what quality is the best, try out a few variants and check them out on multiple devices (laptop, mobile, tablet…) and then decide what is the most effective quality.
Final thoughts
Now you know how to approach your visual content and become a pro, just like you are in your niche.
When every aspect of your blog looks great and is made with a lot of thought and care, your readers are more likely to trust you and return to your blog again.
You no longer have to learn everything from scratch to make appealing graphics, thanks to free online design software. Start using that software and you’ll become a pro in no time.